Snake Game Core Components
Introducing the foundational components for our game and setting up the project
In this lesson, we'll build the foundational components of our Snake game. We'll implement the essential components for window management, asset handling, and user interface. This framework will serve as the backbone for our game's implementation.
The GameConfig.h File
Similar to our previous project, we'll create a header file to store configuration options for our game. This will include things like sizes, positions, colors, and the fonts and images we want to use.
We'll also include a helper function that checks and logs out if there are any SDL errors, as well as a CHECK_ERRORS preprocessor definition which we can turn off to disable this behavior.
#pragma once
#define CHECK_ERRORS
#include <iostream>
#include <SDL.h>
#include <string>
namespace Config{
// Game Settings
inline const std::string GAME_NAME{"Snake"};
inline constexpr int WINDOW_HEIGHT{400};
inline constexpr int WINDOW_WIDTH{800};
// Colors
inline constexpr SDL_Color BACKGROUND_COLOR{
85, 138, 52, 255};
inline constexpr SDL_Color FONT_COLOR{
255, 255, 255, 255};
// Asset Paths
inline const std::string APPLE_IMAGE{
"apple.png"};
inline const std::string FONT{
"Rubik-SemiBold.ttf"};
}
inline void CheckSDLError(
const std::string& Msg){
#ifdef CHECK_ERRORS
const char* error = SDL_GetError();
if (*error != '\0') {
std::cerr << Msg << " Error: "
<< error << '\n';
SDL_ClearError();
}
#endif
}The Engine/Window.h File
Within the Engine directory, we'll include some generic helpers that our game can use. First, we'll have a Window class which we'll use to create and manage our SDL_Window:
#pragma once
#include <SDL.h>
#include "GameConfig.h"
class Window {
public:
Window() {
SDLWindow = SDL_CreateWindow(
Config::GAME_NAME.c_str(),
SDL_WINDOWPOS_UNDEFINED,
SDL_WINDOWPOS_UNDEFINED,
Config::WINDOW_WIDTH,
Config::WINDOW_HEIGHT, 0
);
CheckSDLError("Creating Window");
}
~Window() {
if (SDLWindow && SDL_WasInit(SDL_INIT_VIDEO)) {
SDL_DestroyWindow(SDLWindow);
}
}
Window(const Window&) = delete;
Window& operator=(const Window&) = delete;
void Render() {
SDL_FillRect(
GetSurface(), nullptr,
SDL_MapRGB(GetSurface()->format,
Config::BACKGROUND_COLOR.r,
Config::BACKGROUND_COLOR.g,
Config::BACKGROUND_COLOR.b));
}
void Update() {
SDL_UpdateWindowSurface(SDLWindow);
}
SDL_Surface* GetSurface() {
return SDL_GetWindowSurface(SDLWindow);
}
private:
SDL_Window* SDLWindow;
};This Window class is similar to what we created in our earlier lesson on SDL windows:
Creating a Window
Learn how to create and customize windows, covering initialization, window management, and rendering
The Engine/Random.h File
Our game needs the ability to place apples in random cells. To support this, we'll include a Random namespace which includes the ability to generate random integers within a range defined by Min and Max arguments:
#pragma once
#include <random>
namespace Random {
inline std::random_device SEEDER;
inline std::mt19937 ENGINE{SEEDER()};
inline int Int(int Min, int Max) {
std::uniform_int_distribution Get{Min, Max};
return Get(ENGINE);
}
}This file uses techniques we covered in our introductory lesson:
Random Number Generation
This lesson covers the basics of using randomness, with practical applications
The Engine/Text.h File
We'll include a Text class that uses SDL_ttf to load a font and render text onto an SDL_Surface:
#pragma once
#include <SDL.h>
#include <SDL_ttf.h>
#include <string>
#include "GameConfig.h"
class Text {
public:
Text(
const std::string& InitialText,
int FontSize
) : Content(InitialText),
Font(nullptr),
TextSurface(nullptr) {
Font = TTF_OpenFont(
Config::FONT.c_str(), FontSize);
CheckSDLError("Opening Font");
SetText(InitialText);
}
~Text() {
if (TextSurface) {
SDL_FreeSurface(TextSurface);
}
if (Font) {
TTF_CloseFont(Font);
}
}
Text(const Text&) = delete;
Text& operator=(const Text&) = delete;
void SetText(const std::string& NewText) {
Content = NewText;
if (TextSurface) {
SDL_FreeSurface(TextSurface);
}
TextSurface = TTF_RenderText_Blended(
Font, Content.c_str(), Config::FONT_COLOR);
CheckSDLError("Creating Text Surface");
}
void Render(
SDL_Surface* Surface, SDL_Rect* Rect
) {
if (TextSurface) {
SDL_BlitSurface(
TextSurface, nullptr, Surface, Rect
);
}
}
private:
std::string Content;
TTF_Font* Font;
SDL_Surface* TextSurface;
};This Text class uses the techniques we covered in our introduction to SDL_ttf:
Rendering Text with SDL_ttf
Learn to render and manipulate text in SDL2 applications using the official SDL_ttf extension
The Engine/Image.h File
The last file in our Engine directory contains an Image class that uses SDL_image to render an image onto an SDL_Surface:
#pragma once
#include <SDL.h>
#include <SDL_image.h>
#include <string>
class Image {
public:
Image(const std::string& Path) {
ImageSurface = IMG_Load(Path.c_str());
CheckSDLError("Loading Image");
}
~Image() {
if (ImageSurface) {
SDL_FreeSurface(ImageSurface);
}
}
void Render(
SDL_Surface* Surface, SDL_Rect* Rect
) {
SDL_BlitScaled(
ImageSurface, nullptr, Surface, Rect);
}
// Prevent copying
Image(const Image&) = delete;
Image& operator=(const Image&) = delete;
private:
SDL_Surface* ImageSurface;
};This Image class uses the techniques we covered in our introduction to images, surface blitting, and SDL_Image:
Loading and Displaying Images
Learn how to load, display, and optimize image rendering in your applications
The Assets.h File
We'll create an asset manager class to make our shared assets available to any component that needs them. In this project, we'll only need to share our apple image, but we'll create an Assets class to take care of this and give us an easy way to expand our asset collection as needed:
#pragma once
#include "GameConfig.h"
#include "Engine/Image.h"
struct Assets {
Image Apple{Config::APPLE_IMAGE};
};The GameUI.h File
To manage our UI elements, we'll create a GameUI class. It includes our standard set of game loop methods, HandleEvent(), Tick() and Render().
It will forward these calls to the UI elements it manages, once we create them.
#pragma once
#include <SDL.h>
#include "Assets.h"
class GameUI {
public:
void HandleEvent(SDL_Event& E) {}
void Tick(Uint32 DeltaTime) {}
void Render(SDL_Surface* Surface) {}
private:
Assets Assets;
};The main.cpp File
Let's hook everything up in our main() function. It implements the standard game loop and event loop setup we've used throughout the course. We'll forward events, tick, and render our Window and GameUI as appropriate.
We'll also calculate the time delta between frames to help our Tick() functions. We'll provide these time deltas in milliseconds:
#include <SDL.h>
#include <SDL_image.h>
#include <SDL_ttf.h>
#include "Engine/Window.h"
#include "GameUI.h"
int main(int argc, char** argv) {
SDL_Init(SDL_INIT_VIDEO);
CheckSDLError("Initializing SDL");
IMG_Init(IMG_INIT_PNG);
CheckSDLError("Initializing SDL_image");
TTF_Init();
CheckSDLError("Initializing SDL_ttf");
Window GameWindow{};
GameUI UI{};
Uint32 PreviousTick{SDL_GetTicks()};
Uint32 CurrentTick;
Uint32 DeltaTime;
SDL_Event Event;
while (true) {
CurrentTick = SDL_GetTicks();
DeltaTime = CurrentTick - PreviousTick;
// Events
while (SDL_PollEvent(&Event)) {
UI.HandleEvent(Event);
if (Event.type == SDL_QUIT) {
SDL_Quit();
IMG_Quit();
return 0;
}
}
// Tick
UI.Tick(DeltaTime);
// Render
GameWindow.Render();
UI.Render(GameWindow.GetSurface());
// Swap
GameWindow.Update();
PreviousTick = CurrentTick;
}
return 0;
}Assets and Dependencies
This project requires a font to render text, and an image to represent the apples that our snake eats. Our implementation assumes that the apple image is an approximately square .png file with a transparent background. The screenshot and code examples in this chapter are using the following assets:
Rubik-SemiBold.tfffrom Google Fontsapple.pngby AomAm on IconFinder
We'll save our font and image in the Assets/ directory to ensure our project files contain all the required assets. However, we also need to ensure we ship them alongside our executable. This is also the case when running the game on our machine - we need to place these assets in the same location where our build tools are creating our executable.
We additionally need to ensure this directory also contains the required SDL libraries:
- The SDL library (eg
SDL.dll) - The SDL_image (eg
SDL_image.dll) - The SDL_ttf library (eg
SDL_ttf.dll)
We covered this process in detail in our introductory chapter where we installed these libraries for the first time.
The CMakeLists.txt File
Those using the CMake build automation tool may find the following CMakeLists.txt file helpful. It assumes we're building the SDL libraries (SDL, SDL_image, and SDL_ttf) from a subdirectory called /external.
This CMake configuration also automatically copies our image, font, and DLL files to the output directory when we build our game:
cmake_minimum_required(VERSION 3.16)
set(CMAKE_CXX_STANDARD 20)
project(Snake VERSION 1.0.0)
add_executable(Snake
"main.cpp"
"GameConfig.h"
"Engine/Window.h"
"Engine/Image.h"
"Engine/Text.h"
"Engine/Random.h"
"GameUI.h"
"Assets.h"
# Files that will be added later:
# "GameState.h"
# "Cell.h"
# "Grid.h"
# "SnakeData.h"
# "ScoreCounter.h"
# "RestartButton.h"
)
target_include_directories(
Snake PUBLIC ${PROJECT_SOURCE_DIR}
)
add_subdirectory(external/SDL)
add_subdirectory(external/SDL_image)
add_subdirectory(external/SDL_ttf)
target_link_libraries(Snake PRIVATE
SDL2
SDL2_image
SDL2_ttf
)
if (WIN32)
target_link_libraries(
Snake PRIVATE SDL2main
)
endif()
set(AssetDirectory "${PROJECT_SOURCE_DIR}/Assets")
add_custom_command(
TARGET Snake POST_BUILD COMMAND
${CMAKE_COMMAND} -E copy_if_different
"$<TARGET_FILE:SDL2>"
"$<TARGET_FILE:SDL2_image>"
"$<TARGET_FILE:SDL2_ttf>"
"${AssetDirectory}/apple.png"
"${AssetDirectory}/Rubik-SemiBold.ttf"
"$<TARGET_FILE_DIR:Snake>"
VERBATIM
)We covered this approach to setting up an SDL project in a dedicated chapter earlier in the course:
Building SDL2 from a Subdirectory (CMake)
A step-by-step guide on setting up SDL2 and useful extensions in a project that uses CMake as its build system
Running the Project
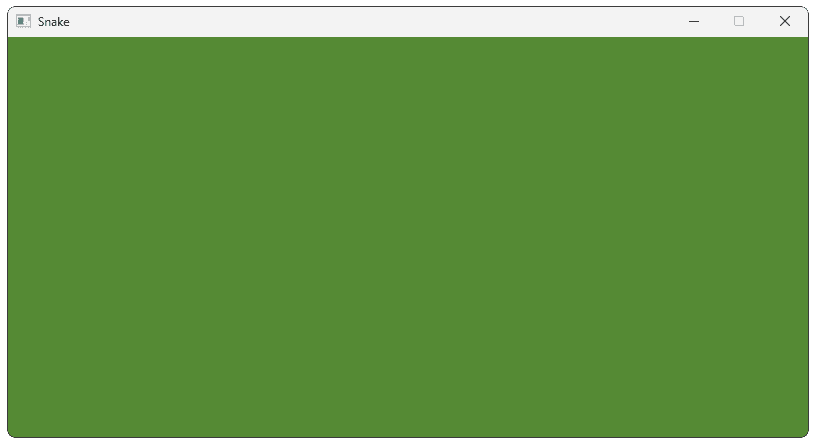
Our project should compile and run successfully. We should see a window with the title, width, height, and background color we defined in GameConfig.h:
Summary
This lesson covered the essential building blocks of our Snake game, implementing the core game loop and supporting features. Key components:
- The
GameConfig.hheader file stores configuration variables that will control our game's logic and presentation - The
Windowclass is responsible for managing our window, including the underlyingSDL_Windowpointer - The
Randomnamespace allows us to generate random integers, which we'll need to dynamically position the apples our snake needs to eat - The
TextandImageclasses manage the rendering of fonts and image files, providing the content in the form of anSDL_Surface. - The
Assetclass manages our image assets, allowing them to be shared across multiple components later in our game - The
GameUIclass is where we will construct and orchestrate all of our UI elements as we build them in future lessons - The
mainfunction inmain.cpppulls everything together by initializing the core components and implementing a standard application loop to manage our systems.
Building the Snake Grid
Build the foundational grid structure that will power our Snake game's movement and collision systems.