Image and Entity Scaling
Add width, height, and scaling modes to our entities and images
This legacy content uses SDL2
An updated version using SDL3 is available
Our ImageComponent can now render images, but they always appear at their original size, defined by the dimensions of the image file our AssetManager loads into the surface.
We want more control over the size of our entities. Specifically, we want to control the size in two different ways:
- Image Size - In an ideal world, all of our art assets would be perfectly sized in relation to each other. If a dragon is twice the size of our player, our dragon image would be twice the size of the player image. We're rarely this lucky so, within our
ImageComponent, we need the ability to intervene and specify what size each individual images should be rendered at. - Entity Size - We want some entities to be physically larger than others - even entities of the same type. The size of an entity also effects the size of that entity's
ImageComponents renderat, but it has wider implications too. Larger entities also have larger bounding boxes for physics calculations. If our entities had audio, larger entities might be louder, and so on. The overall size of an entity will be defined within it'sTransformComponent.
We'll implement both of these in this lesson!
Starting Point
In the previous lesson, we successfully integrated our ImageComponent with an AssetManager, rendered images using SDL_BlitSurface(), handled coordinate transformations, and added offsets for precise positioning.
Here's the ImageComponent code we finished with:
Image Width and Height
Let's allow the ImageComponent to have a desired rendering width and height, independent of the underlying SDL_Surface dimensions. We'll add Width and Height members (as floats, for potential fractional scaling later) and corresponding getter/setter methods.
By default, if these aren't set, we'll fall back to the image's natural dimensions. We use std::optional<float> to represent this "maybe set" state. std::optional holds either a value of the specified type (float) or no value (std::nullopt).
Nullable Values, std::optional and Monadic Operations
A comprehensive guide to using std::optional to represent values that may or may not be present.
First, include the <optional> header and add the members and methods to ImageComponent.h:
// ImageComponent.h
// ...
#include <optional>
class ImageComponent : public Component {
public:
// ...
// New Getters/Setters for Width/Height
void SetWidth(float NewWidth);
void SetHeight(float NewHeight);
void ResetWidth();
void ResetHeight();
float GetWidth() const;
float GetHeight() const;
private:
// ...
std::optional<float> Width{std::nullopt};
std::optional<float> Height{std::nullopt};
};Now, implement these in ImageComponent.cpp. The setters simply assign the provided value. ResetWidth/ResetHeight set the optional back to std::nullopt.
The getters check if a value has been explicitly set using the value_or() method on std::optional. This method returns the optional value if it has one, or the value we provide as an argument otherwise:
// ImageComponent.cpp
// ...
#include <optional>
// ...
void ImageComponent::SetWidth(float NewWidth) {
Width = NewWidth;
}
void ImageComponent::SetHeight(float NewHeight) {
Height = NewHeight;
}
void ImageComponent::ResetWidth() {
Width = std::nullopt;
}
void ImageComponent::ResetHeight() {
Height = std::nullopt;
}
float ImageComponent::GetWidth() const {
// If Width has a value, return it.
// Otherwise, return surface width.
return Width.value_or(GetSurfaceWidth());
}
float ImageComponent::GetHeight() const {
// If Height has a value, return it.
// Otherwise, return surface height.
return Height.value_or(GetSurfaceHeight());
}
// ...Now our component knows its target rendering size. Next, we need to handle how the image fits into that size.
Scaling Modes
When the target width and height - GetWidth(), GetHeight() - don't match the image's natural aspect ratio, how should we render it?
We could stretch it, fit it entirely within the bounds while preserving aspect ratio, or cover the bounds completely, potentially cropping parts of the image. We'll implement four common scaling modes:
- None: Render the image at its natural size, ignoring any requested
Width/Height. This is our current behavior, but we'll formalize it through the same system that our other scaling modes will use. - Fill: Stretch the image to completely fill the target width and height. If the
Width/Heightin ourImageComponenthas a different aspect ratio from our image, this will cause our image to be stretched. This is a sensible default as it tends to be most intuitive - if someone specifies they want the image rendered at a specific width and height, the image will be stretched to fit that specification. - Contain: Scale the image as large as possible while preserving its aspect ratio, ensuring the entire image fits within the target width and height. This prevents the image being deformed but, if the image has a different aspect ratio to the requested
Width/Height, it won't fill the entire space. - Cover: Scale the image as small as possible while preserving its aspect ratio, ensuring the image completely covers the target width and height without deformation. However, if the image has a different aspect ratio to the requested
Width/Height, parts of the image will be cropped.

To manage these, let's define an enum class in ImageComponent.h:
// ImageComponent.h
// ...
enum class ScalingMode {
None, Fill, Contain, Cover
};
class ImageComponent : public Component {
public:
// ...
void SetScalingMode(ScalingMode Mode);
private:
// ...
// Default to None
ScalingMode ScaleMode{ScalingMode::Fill};
};And implement the simple setter in ImageComponent.cpp:
// ImageComponent.cpp
// ...
void ImageComponent::SetScalingMode(ScalingMode Mode) {
ScaleMode = Mode;
}
// ...Now, our component can track which scaling mode to use. The real work happens in the Render() function.
Using SDL_BlitScaled()
To implement these scaling modes, SDL_BlitSurface() isn't sufficient as it doesn't handle resizing. We need its more powerful sibling: SDL_BlitScaled().
SDL_BlitScaled() works similarly but takes destination width and height into account, scaling the source rectangle to fit the destination rectangle. Here is its signature:
int SDL_BlitScaled(
SDL_Surface* src,
const SDL_Rect* srcrect,
SDL_Surface* dst,
SDL_Rect* dstrect
);src: The source surface (ourImageSurface).srcrect: The portion of the source to copy (nullptrfor the whole surface, or a specificSDL_Rect).dst: The destination surface (the window).dstrect: The target area on the destination surface.SDL_BlitScaled()will scale the content fromsrcrectto fit exactly intodstrect.
The core idea for implementing our scaling modes will be calculating the correct srcrect and dstrect based on the ScaleMode, the image dimensions, and the target Width/Height.
Helper Function for Blit Rectangles
Calculating the source and destination rectangles for each scaling mode within the Render() function will make it very cluttered. Let's create a helper function to encapsulate this logic.
We'll define a simple struct to hold the pair of rectangles, possibly in an anonymous namespace as it's only needed locally, within this same file:
// ImageComponent.cpp
// ...
namespace {
struct BlitInfo {
SDL_Rect SourceRect;
SDL_Rect DestRect;
};
}
// ...To calculate the source and destination rectangle, we'll need the following information:
- The
ScalingModewe want to use - The natural size of our image (ie, the size of the
SDL_Surfacereturned from ourAssetManager. We'll call thisSurfaceWandSurfaceH. - The position we want the image to have on the target surface. We'll call these values
TargetXandTargetY - The size we want the image to be on the target surface. We'll call these values
TargetWandTargetH
Let's set it up a helper function that receives this information, and returns the required BlitInfo:
// ImageComponent.cpp
// ...
namespace {
struct BlitInfo {/*...*/};
// Helper function to calculate source and
// destination rectangles
BlitInfo CalculateBlitInfo(
ScalingMode Mode,
// Natural surface dimensions
int SurfaceW, int SurfaceH,
// Target top-left screen position
float TargetX, float TargetY,
// Target rendering dimensions
float TargetW, float TargetH
) {
BlitInfo Info;
// Default to rendering the whole image
Info.SourceRect = {
0, 0, SurfaceW, SurfaceH
};
// We will implement the logic for each
// scaling mode here later...
Info.DestRect = Utilities::Round({
TargetX, TargetY, TargetW, TargetH
});
return Info;
}
}
// ...Now, let's refactor ImageComponent::Render() to gather all the information that CalculateBlitInfo() requires, and pass it along to generate our source and destination rectangles.
We'll also switch from using SDL_BlitSurface() to SDL_BlitScaled() to support our future scaling modes:
// ImageComponent.cpp
// ...
void ImageComponent::Render(SDL_Surface*) {/*...*/}
void ImageComponent::Render(
SDL_Surface* Surface
) {
if (!ImageSurface) return;
auto [TargetX, TargetY]{
GetOwnerScreenSpacePosition() + Offset
};
float TargetW{GetWidth()};
float TargetH{GetHeight()};
int SurfaceW{GetSurfaceWidth()};
int SurfaceH{GetSurfaceHeight()};
BlitInfo Info{CalculateBlitInfo(
ScaleMode,
SurfaceW, SurfaceH,
TargetX, TargetY,
TargetW, TargetH
)};
if (SDL_BlitScaled(
ImageSurface.get(),
&Info.SourceRect,
Surface,
&Info.DestRect
) < 0) {
std::cerr << "Error: Blit failed: "
<< SDL_GetError() << '\n';
}
}
// ...Our Render() function is now much more flexible. Additionally, it doesn't need to get any more complicated to support different scaling modes. All the complexity of scaling is delegated to CalculateBlitInfo().
Let's implement the logic for each mode inside that helper.
Scaling Mode: None
In None mode, we want to render the image at its natural size. The TargetW and TargetH are ignored for the size of the blit, but we might use them to center the image if the target area is larger. For simplicity here, we'll just render at the natural size at the TargetX, TargetY, exactly as we were before:
// ImageComponent.cpp
// ...
namespace {
struct BlitInfo {/*...*/};
BlitInfo CalculateBlitInfo(
ScalingMode Mode,
int SurfaceW, int SurfaceH,
float TargetX, float TargetY,
float TargetW, float TargetH
) {
BlitInfo Info;
Info.SourceRect = {
0, 0, SurfaceW, SurfaceH
};
if (Mode == ScalingMode::None) {
// Render at natural image size
// and at the target position
Info.DestRect = Utilities::Round({
TargetX,
TargetY,
static_cast<float>(SurfaceW),
static_cast<float>(SurfaceH)
});
return Info;
}
// Handle other modes later...
return Info;
}
}
// ...Scaling Mode: Fill
The Fill mode is the simplest: stretch the source image to exactly match the target dimensions, ignoring aspect ratio. SDL_BlitScaled() does this by default if you provide the full source rect and the target destination rect.
// ImageComponent.cpp
// ...
namespace {
struct BlitInfo {/*...*/};
BlitInfo CalculateBlitInfo(
ScalingMode Mode,
int SurfaceW, int SurfaceH,
float TargetX, float TargetY,
float TargetW, float TargetH
) {
BlitInfo Info;
Info.SourceRect = {
0, 0, SurfaceW, SurfaceH
};
if (Mode == ScalingMode::None) {/*...*/}
if (Mode == ScalingMode::Fill) {
// Stretch source to fill the exact
// target dimensions
Info.DestRect = Utilities::Round({
TargetX, TargetY, TargetW, TargetH
});
return Info;
}
// Handle other modes later...
return Info;
}
}
// ...Scaling Mode: Contain
To implement Contain, we need to figure out the largest possible size the image can be while fitting inside the TargetW and TargetH dimensions, without distorting the image's aspect ratio.
First, we calculate the scaling factor needed to fit the width (TargetW / SurfaceW) and the scaling factor needed to fit the height (TargetH / SurfaceH).
To ensure the entire image fits within the target bounds, we must use the smaller of these two scaling factors. If we used the larger one, one dimension would fit, but the other would exceed the target boundary. std::min() gives us this smaller scale.
We apply this Scale to the original SurfaceW and SurfaceH to get the final dimensions for our DestRect. The SourceRect remains the entire original image surface, as we want to draw the whole image, just scaled down. The DestRect position is set to TargetX, TargetY.
// ImageComponent.cpp
// ...
namespace {
struct BlitInfo {/*...*/};
BlitInfo CalculateBlitInfo(
ScalingMode Mode,
int SurfaceW, int SurfaceH,
float TargetX, float TargetY,
float TargetW, float TargetH
) {
BlitInfo Info;
Info.SourceRect = {
0, 0, SurfaceW, SurfaceH
};
if (Mode == ScalingMode::None) {/*...*/}
if (Mode == ScalingMode::Fill) {/*...*/}
if (Mode == ScalingMode::Contain) {
float Scale{std::min(
TargetW / SurfaceW,
TargetH / SurfaceH
)};
Info.DestRect = Utilities::Round({
TargetX, TargetY,
SurfaceW * Scale,
SurfaceH * Scale
});
return Info;
}
// Handle remaining mode next...
return Info;
}
}
// ...Scaling Mode: Cover
For Cover mode, we want the image to preserve its aspect ratio but scale up just enough to completely fill the TargetW and TargetH. This might mean some parts of the image are cropped.
Similar to Contain, we calculate the horizontal (TargetW / SurfaceW) and vertical (TargetH / SurfaceH) scaling factors. However, this time, we need the image to be at least as large as the target bounds in both dimensions. Therefore, we choose the larger of the two scaling factors using std::max().
Using this larger Scale, the scaled image will perfectly match the target bounds in one dimension but potentially exceed them in the other. To handle this, we don't change the DestRect (it stays as the full TargetW, TargetH), but instead, we adjust the SourceRect.
// ImageComponent.cpp
// ...
namespace {
struct BlitInfo {/*...*/};
BlitInfo CalculateBlitInfo(
ScalingMode Mode,
int SurfaceW, int SurfaceH,
float TargetX, float TargetY,
float TargetW, float TargetH
) {
BlitInfo Info;
Info.SourceRect = {
0, 0, SurfaceW, SurfaceH
};
if (Mode == ScalingMode::None) {/*...*/}
if (Mode == ScalingMode::Fill) {/*...*/}
if (Mode == ScalingMode::Contain) {/*...*/}
if (Mode == ScalingMode::Cover) {
float Scale{std::max(
TargetW / SurfaceW,
TargetH / SurfaceH
)};
if (Scale * SurfaceW > TargetW) {
float ClipW{TargetW / Scale};
Info.SourceRect = Utilities::Round({
0, 0,
ClipW,
static_cast<float>(SurfaceH)
});
} else if (Scale * SurfaceH > TargetH) {
float ClipH{TargetH / Scale};
Info.SourceRect = Utilities::Round({
0, 0,
static_cast<float>(SurfaceW),
ClipH
});
}
Info.DestRect = Utilities::Round({
TargetX,
TargetY,
TargetW,
TargetH
});
return Info;
}
std::cerr << "Error: Unknown Scaling Mode\n";
return Info;
}
}
// ...We now have all four scaling modes implemented!
Entity Scaling
Our images can now scale based on the ImageComponent's Width, Height, and ScaleMode. But what if we want to scale the entire entity - affecting not just its visuals but potentially its collision bounds, audio volume, or other properties?
This is distinct from the ImageComponent's scaling. For instance, scaling an entity might make its character model larger and increase its physics footprint, while ImageComponent scaling only affects how that model is drawn within its component bounds.
Updating the Transform Component
Let's add a uniform scaling factor to TransformComponent.
// TransformComponent.h
// ...
class TransformComponent : public Component {
public:
// ...
float GetScale() const { return Scale; }
void SetScale(float NewScale) {
Scale = NewScale;
}
private:
// ...
float Scale{1.0};
};Updating the Component Class
To make this scale easier to access from an entity's components, let's add a GetOwnerScale() helper function to the Component base class:
// Component.h
// ...
class Component {
public:
// ...
float GetOwnerScale() const;
// ...
};// Component.cpp
// ...
float Component::GetOwnerScale() const {
TransformComponent* Transform{
GetOwner()->GetTransformComponent()};
if (!Transform) {
std::cerr << "Error: attempted to get scale"
" of an entity with no transform component\n";
return 1.0;
}
return Transform->GetScale();
}Updating the Image Component
Now, ImageComponent::Render needs to account for the entity's scale. We should apply the TransformComponent's scale to the ImageComponent's target dimensions before calculating the blit information.
// ImageComponent.cpp
// ...
void ImageComponent::Render(
SDL_Surface* Surface
) {
if (!ImageSurface) return;
auto [TargetX, TargetY]{
GetOwnerScreenSpacePosition() + Offset};
// Before
float TargetW{GetWidth()};
float TargetH{GetHeight()};
// After
float TargetW{GetWidth() * GetOwnerScale()};
float TargetH{GetHeight() * GetOwnerScale()};
}
// ...Now, setting the TransformComponent's scale will uniformly scale the visual representation provided by the ImageComponent.
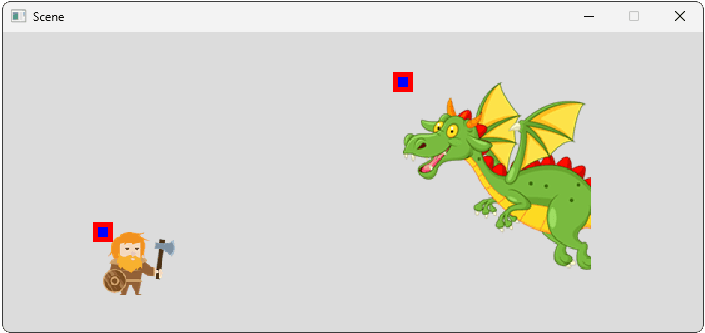
Let's test this in Scene.h. We'll make the player smaller through the transform component, and we'll specify the size we want the enemy to be rendered at using its ImageComponent.
We'll set the scaling mode to Cover so the image component will respect both the size we specified and the image's aspect ratio, but will crop the image:
// Scene.h
// ...
class Scene {
public:
Scene() {
EntityPtr& Player{Entities.emplace_back(
std::make_unique<Entity>(*this))};
Player->AddTransformComponent()
->SetPosition({2, 2});
Player->GetTransformComponent()
->SetScale(0.75);
Player->AddImageComponent("player.png");
EntityPtr& Enemy{Entities.emplace_back(
std::make_unique<Entity>(*this))};
Enemy->AddTransformComponent()
->SetPosition({8, 5});
Enemy->GetTransformComponent()
->SetScale(1.25);
ImageComponent* EnemyImage{
Enemy->AddImageComponent("dragon.png")};
EnemyImage->SetWidth(150);
EnemyImage->SetHeight(150);
EnemyImage->SetScalingMode(ScalingMode::Cover);
}
// ...
};Running this should show our player scaled down to 75% of his previous size, and our dragon cropped to a 150x150 pixel area, and then scaled up by 25%.
In this case, the requested 150x150 pixel size has a different aspect ratio to our original dragon image so. Because we've set the Cover scaling mode, our dragon image gets scaled just enough to cover the 150x150 pixel area, and excess pixels get cropped:
Drawing Debug Helpers
Finally, let's update our debug drawing to help us visualize what is going on with our images.
Our current DrawDebugHelpers() function just draws a small square at the entity's origin. Let's update it to visualize the scaling we've implemented. We'll draw draw two rectangles:
- The image's natural bounds (at its original size, affected by entity scale).
- The image's rendered bounds (after applying
Width,Height, andScaleMode, also affected by entity scale).
Since SDL surfaces don't have a built-in rectangle outline function, we'll create a small helper function for this. We introduced a technique for doing this in our earlier lesson on bounding boxes:
Bounding Boxes
Discover bounding boxes: what they are, why we use them, and how to create them
We'll use the same technique (and essentially the same code) from that lesson, drawing our rectangular outline as four thin rectangles - one for each edge. Other components may need the ability to draw these outlines too, so let's add that code to our Utilities.h header:
// Utilities.h
// ...
#pragma once
#include <SDL.h>
namespace Utilities{
// ...
inline void DrawRectOutline(
SDL_Surface* Surface,
const SDL_Rect& Rect,
Uint32 Color,
int Thickness = 3
) {
SDL_Rect Top{
Rect.x,
Rect.y,
Rect.w,
Thickness
};
SDL_FillRect(Surface, &Top, Color);
SDL_Rect Bottom{
Rect.x,
Rect.y + Rect.h - Thickness,
Rect.w,
Thickness
};
SDL_FillRect(Surface, &Bottom, Color);
int SideHeight{Rect.h - 2 * Thickness};
SDL_Rect Left{
Rect.x,
Rect.y + Thickness,
Thickness,
SideHeight
};
SDL_FillRect(Surface, &Left, Color);
SDL_Rect Right{
Rect.x + Rect.w - Thickness,
Rect.y + Thickness,
Thickness,
SideHeight
};
SDL_FillRect(Surface, &Right, Color);
}
}Then, within DrawDebugHelpers(), we'll combine the helper functions and techniques we covered in this lesson to draw our two rectangles:
// ImageComponent.cpp
// ...
void ImageComponent::DrawDebugHelpers(
SDL_Surface* Surface
) {
using Utilities::DrawRectOutline;
if (!ImageSurface) return;
// Gather our position and dimensions for
// the CalculateBlitInfo() function,
// similar to what we did in Render()
auto [TargetX, TargetY]{
GetOwnerScreenSpacePosition() + Offset
};
float OwnerScale{GetOwnerScale()};
float TargetW{GetWidth() * OwnerScale};
float TargetH{GetHeight() * OwnerScale};
int SurfaceW{GetSurfaceWidth()};
int SurfaceH{GetSurfaceHeight()};
// 1. Draw Natural Bounds (Green Outline)
SDL_Rect NaturalBounds{
Utilities::Round({
TargetX, TargetY,
SurfaceW * OwnerScale,
SurfaceH * OwnerScale
})};
DrawRectOutline(
Surface, NaturalBounds,
SDL_MapRGB(Surface->format, 0, 255, 0)
);
// 2. Draw Rendered Bounds (Red Outline)
BlitInfo Info{CalculateBlitInfo(
ScaleMode,
SurfaceW, SurfaceH,
TargetX, TargetY,
TargetW, TargetH
)};
DrawRectOutline(
Surface, Info.DestRect,
SDL_MapRGB(Surface->format, 255, 0, 0)
);
// Continue to draw the position
// marker from before (Blue Square)
SDL_Rect DebugRect{Utilities::Round({
TargetX - 5, TargetY - 5, 10, 10
})};
SDL_FillRect(
Surface, &DebugRect,
SDL_MapRGB(Surface->format, 0, 0, 255)
);
}Now, when debug helpers are enabled, you'll see a green rectangle showing where the image would be if rendered at its natural size (but scaled by the entity's transform), and a red rectangle showing the final bounds calculated by CalculateBlitInfo().
These rendered bounds reflect the chosen ScaleMode, Width, and Height. This helps visualize how ScalingMode::Contain might leave gaps or how ScalingMode::Cover clips the source.

Complete Code
Our completed ImageComponent and Utilities header, including all of the updates we made in this lesson, is provided below:
We also made smaller changes to the Component and TransformComponent classes. We've provided these below, with our changes highlighted:
Summary
In this lesson, we completed the ImageComponent by adding scaling capabilities. It now supports setting a target Width and Height.
Using SDL_BlitScaled() and a ScalingMode enum, we provided options for handling image aspect ratios within those dimensions. We also added entity-level scaling through our TransformComponent, and updated our ImageComponent to respect that scaling
Key takeaways:
std::optionalis useful for representing properties that might not be explicitly set, allowing fallback to default behavior (like using natural image dimensions).SDL_BlitScaled()allows rendering a source rectangle to a destination rectangle of a different size, performing the scaling.- Different scaling strategies (None, Fill, Contain, Cover) are needed to handle aspect ratio mismatches between the source image and target render area.
- Helper functions (like
CalculateBlitInfo) help keeping rendering code clean when implementing complex logic like scaling modes. - Entity-level scaling (
TransformComponent::Scale) should be considered when rendering, but it may have additional effects too, such as changing the physical bounding boxes once we implement collisions. - Drawing debug helpers that visualize the final render bounds aids in understanding and debugging scaling behavior.
Creating a Physics Component
Integrate basic physics simulation into entities using a dedicated component